Hello there,
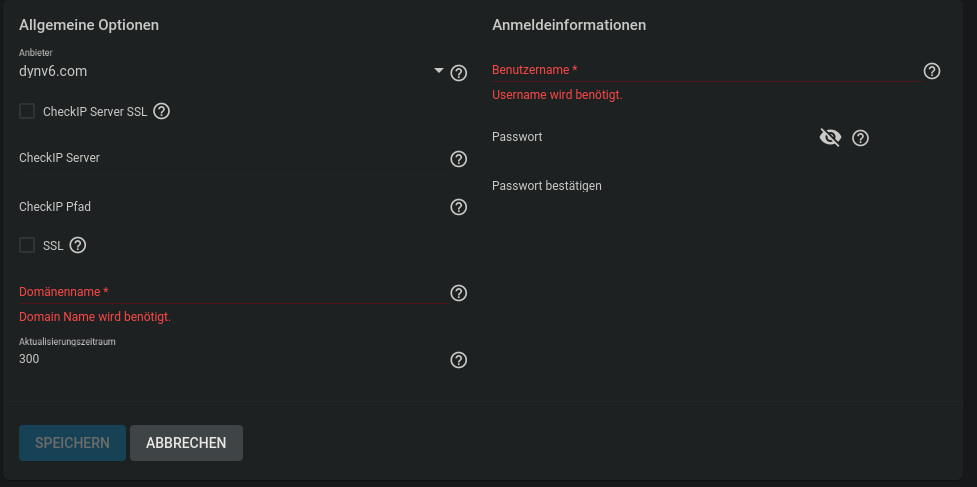
I’m a a bit confused what to put where in the truenas dyndns client form.

I don’t have access to a FreeNAS server anymore, but I believe you need to add the zone name as Domänenname.
For the username, you can try none. If that doesn’t work, try the password as username and leave the password fields blank.
Have you solved this? Because I would also be interested to get dynv6 running on truenas.
Hello there,
I have gone to Unraid. As TrueNas was too difficult for me. (Docker, settings, BSD)
On Unraid I have setup dynv6 on my Fritzbox, my Subdomains in the Fritzbox and SWAG [reverse-proxy) on my Unraid to get access to my containers. I don’t use ipv6, as the Fritzbox has some trouble with that. (https://avm.de/service/fritzbox/fritzbox-7490/wissensdatenbank/publication/show/3525_Zugriff-auf-HTTPS-Server-im-Heimnetz-nicht-moglich/)Using an A-Record works great.
Sadly, in the last few days, dynv6 just lost or removed my A-Record. I don’t know why it disappeared.
Hey Everyone,
I know this is a bit of an old post, but I wanted to post the answer to this question for future people to reference. This is also the only post relative to TrueNAS/FreeNAS in the dynv6 community as well as the first returned result in major search engines.
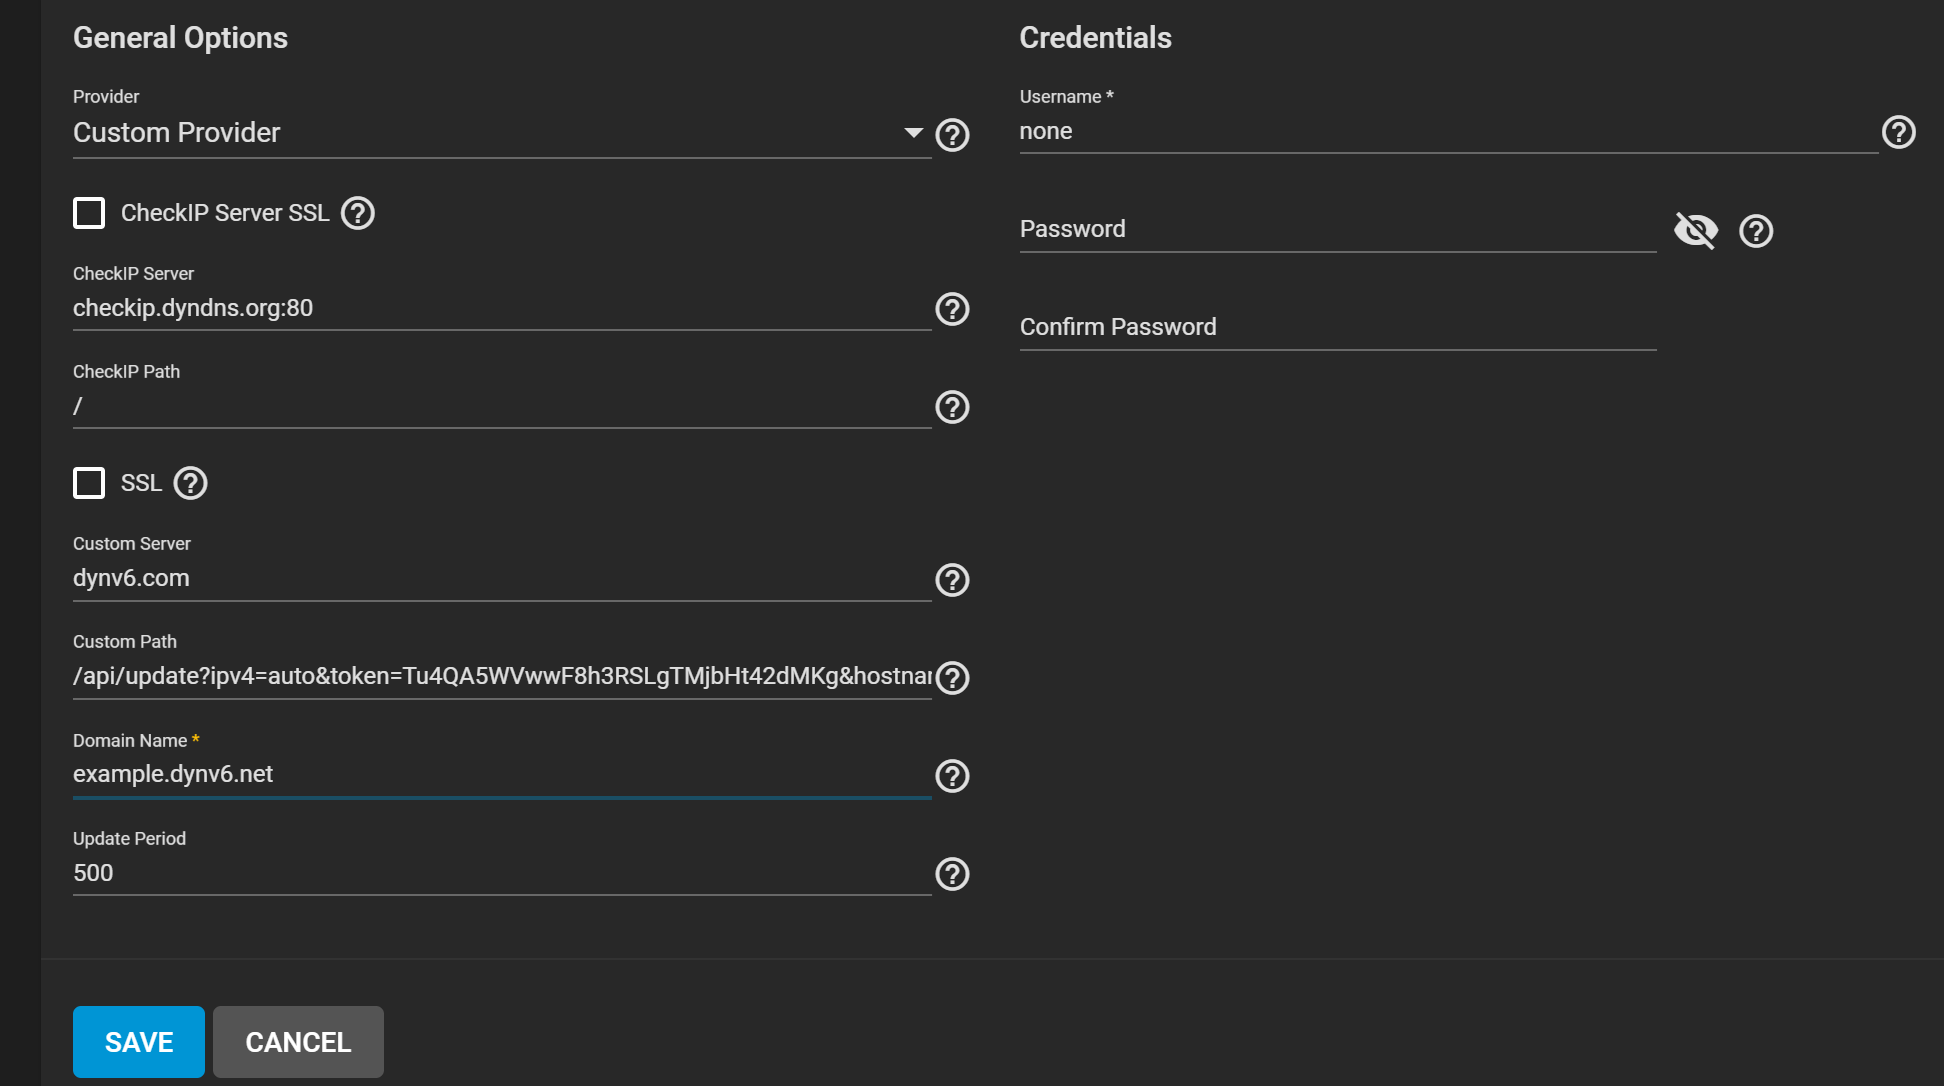
The Answer / Solution:
Provider: ipv4.dynv6.com
CheckIP Server: checkip.dyndns.org:80 (There are numerous services available to checkIPs. You can use any of them.)
CheckIP Path: / (This is the directory or file that you navigate to after the URL. Such as as Current IP Check. As checkip.dyndns.org has no additional pages to resolve to, we’ll use the primary or root directory /"
Username: YourTokenGoesHere (You can find this by going to your username>keys in the top right)
Password: none (Literally enter “none” without quotes, you will not be able to save without a password.)
Domain Name: example.dynv6.net (This is the full domain of your Zone)
Here is an example screenshot:
I hope someone out there finds this useful!
Your Friendly Neighborhood Frog. 𓆏
Alternative DDNS Custom Setup for Dynv6